Category: Tutorials

  • MySQL server not Starting, a usual MAMP headache

    MySQL server not Starting, a usual MAMP headache

    As many others WordPress developers out there, I use MAMP for local development.

    I like the fact that is the faster and easier way to setup a low-maintenance development envi­ron­ment for OSX. Personally, I love setting up and using virtual hosts & WordPress multisite. That way I can work with loads of different projects in an organized manner.

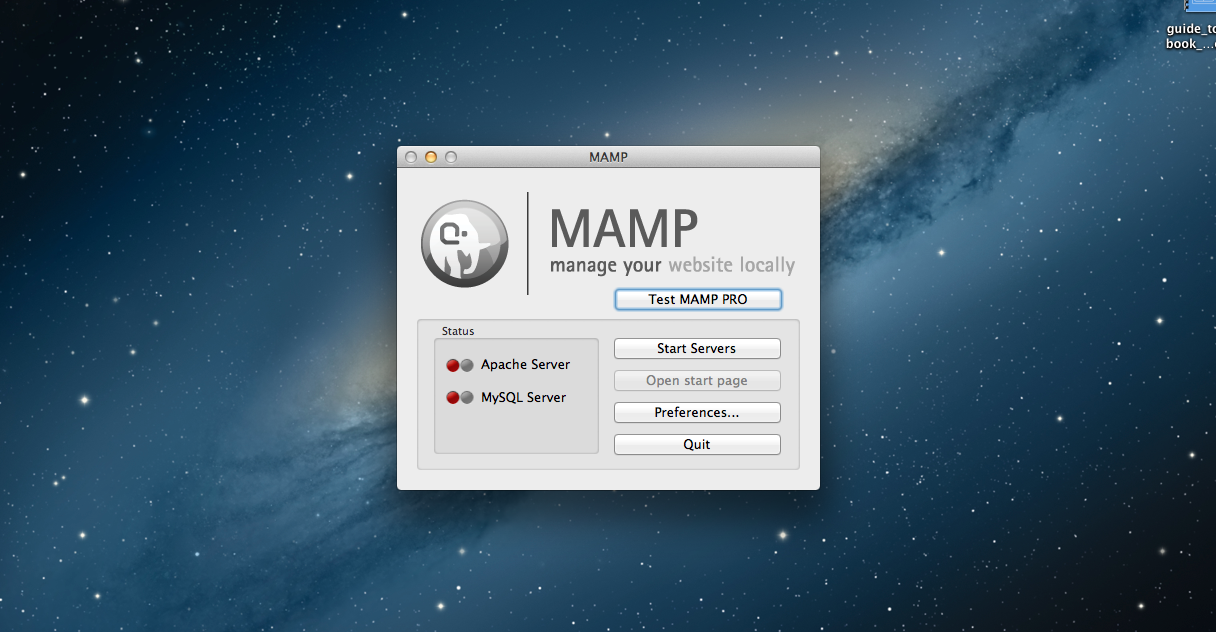
    The only problem I often get with this platform, is that MySQL won’t start. I hate when I resume my computer after sleeping a few hours, and I get that annoying red light just beside “MySQL server” indicator. Sometimes, it also happens when restarting your computer. And there it is, MySQL not starting.

    There’s an easy solution for this, a quick and tiny fix you can run as many times you need. Simply killing all MySQL processes and then starting the servers again. Assuming that not many people hosts websites on OSX, you won’t have any collateral damage.

    All you need to do, is run a simple command on the terminal or hyper.

    killall -9 mysqld
    

    This command will kill off the process. Then you’ll be able to start again your servers by hitting “Start Servers” in the MAMP app.

    Note: Terminal is the terminal emulator included in Apple’s OS X operating system. You can find that app under Applications/Utilities. It’s basically a UNIX Shell. You can check if there are any MySQL processes running the “top” command. You can also use Hyper, a terminal app built by the amazing @rauchg and team.

    Update – January 2017

    If you are having trouble fixing this issue with the instructions above, many readers are being able to solve this problem thanks to the amazing fix shared by one of the commenters, ElCid. The instructions he shared are the following:

    1. Quit MAMP.
    2. In the finder go to Applications/MAMP/db/mysql/ and delete the last log file (look for a file named ib_logfileN – being N the log number). Please back up these before you delete them 🙂
    3. Restart MAMP.
    4. That’s it!
  • How to exclude categories from your WordPress home page.

    Quite often, clients ask me to exclude one or more categories from their site home page. Surprisingly, there’s no chance to set this from the WordPress admin section. That’s why, some time ago, I wrote the following function:

    <?php
    
    function nice_exclude_cat( $query ) { 
    
       if ( $query->is_home() && $query->is_main_query() ) 
            $query->set( 'cat', '-1,-2,-3' );
    
       return $query; 
    }
    
    add_filter( 'pre_get_posts', 'nice_exclude_cat' );
    
    ?>

    Copy and paste the code above into your theme´s functions.php file and voilá.

    For this filter, you can set as many categories as you want (replace ‘-1,-2,-3’ with the IDs of the categories you need to exclude). Please remember to separate them with commas and set the negative sign before the category ID.

    This is a great example of hacking WordPress core functionalities using filters. (Note to myself: I need to write about this)

    I hope you find it useful.

  • Multiple videos with Flexslider v2

    Flexslider, is one of my favorite sliders around, I find it useful on several projects.

    The one thing that I’ve found it was actually missing, was the ability to have multiple videos working with the vimeo API. For me, a complete headache. The awful sound a video overlapping on top of the other. Complete chaos!

    So, reading a bit and after some tryouts I’ve developed a code which makes your slider works without any trouble having several vimeo videos.

    You can check the demo here: DEMO

    Let’s have a look at the entire code:

    jQuery(window).load(function() { 
    	var vimeoPlayers = jQuery('.flexslider').find('iframe'), player; 		
    	
    	for (var i = 0, length = vimeoPlayers.length; i < length; i++) { 		    
    			player = vimeoPlayers[i]; 		    
    			$f(player).addEvent('ready', ready); 		
    	} 		
    	
    	function addEvent(element, eventName, callback) { 	    	
    		if (element.addEventListener) { 		    	
    			element.addEventListener(eventName, callback, false) 		    
    		} else { 	      		
    			element.attachEvent(eventName, callback, false); 	      	
    		} 	    
    	} 	    
    	
    	function ready(player_id) { 	    	
    		var froogaloop = $f(player_id); 	    	
    		froogaloop.addEvent('play', function(data) { 		    	
    			jQuery('.flexslider').flexslider("pause"); 		    
    		}); 		    
    		froogaloop.addEvent('pause', function(data) { 			    
    			jQuery('.flexslider').flexslider("play"); 		    
    		}); 		
    	}  
    	
    	jQuery(".flexslider")     
    	.flexslider({       
    		animation: "slide",
    		useCSS: false,       
    		animationLoop: false,       
    		smoothHeight: true,       
    		before: function(slider){         
    			if (slider.slides.eq(slider.currentSlide).find('iframe').length !== 0)
    			      $f( slider.slides.eq(slider.currentSlide).find('iframe').attr('id') ).api('pause');       
    		}   
    	});
    
    });

    Basically, it creates an array containing all the iframes inside the flexslider wrapper. Then, for each player inside those iframes it sets the event. Lastly, when you initialize the flexslider you set a function for the before action that pauses the player that loses focus.

    It’s really straightforward. There are a couple of things to bear in mind:

    1. Include froogaloop.js

    2. You’ll need to revise each vimeo code and check that they have different id’s, and they use the API.

    
    <iframe id="player_1" src="http://player.vimeo.com/video/39683393?api=1&player_id=player_1" width="320" height="240"></iframe>


    3. Enable videos in your flexslider configuration.

    4. I think that’s all.

    Have fun.